Table of Contents
ToggleMastering the Art of Aurora Photography
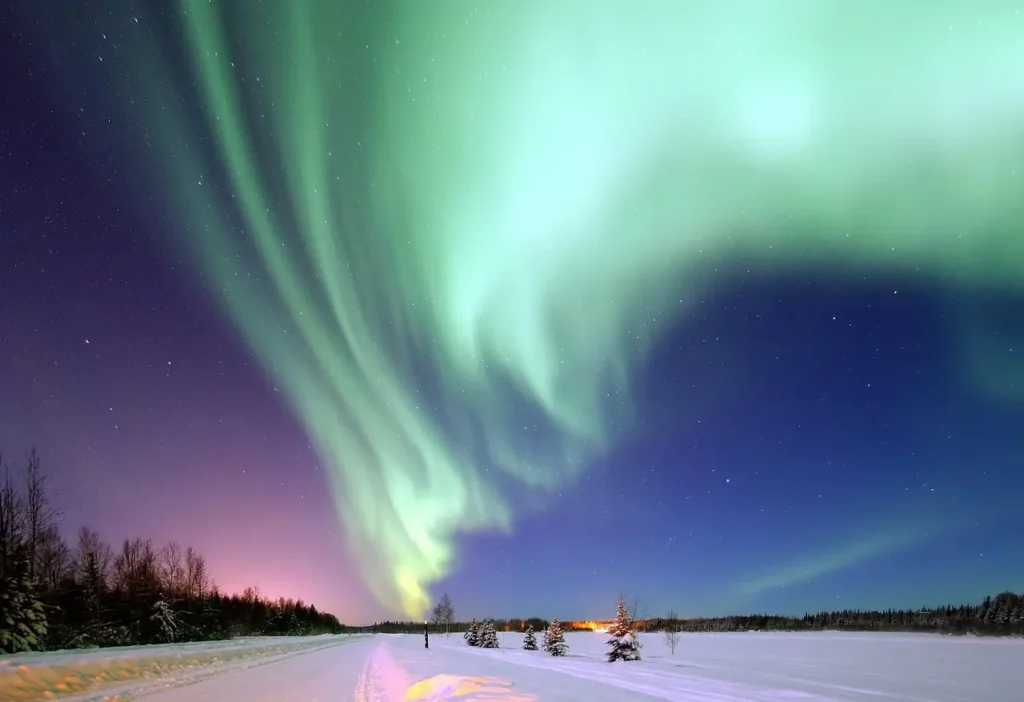
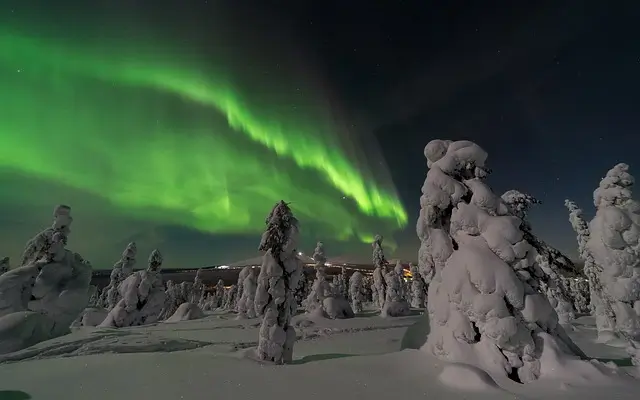
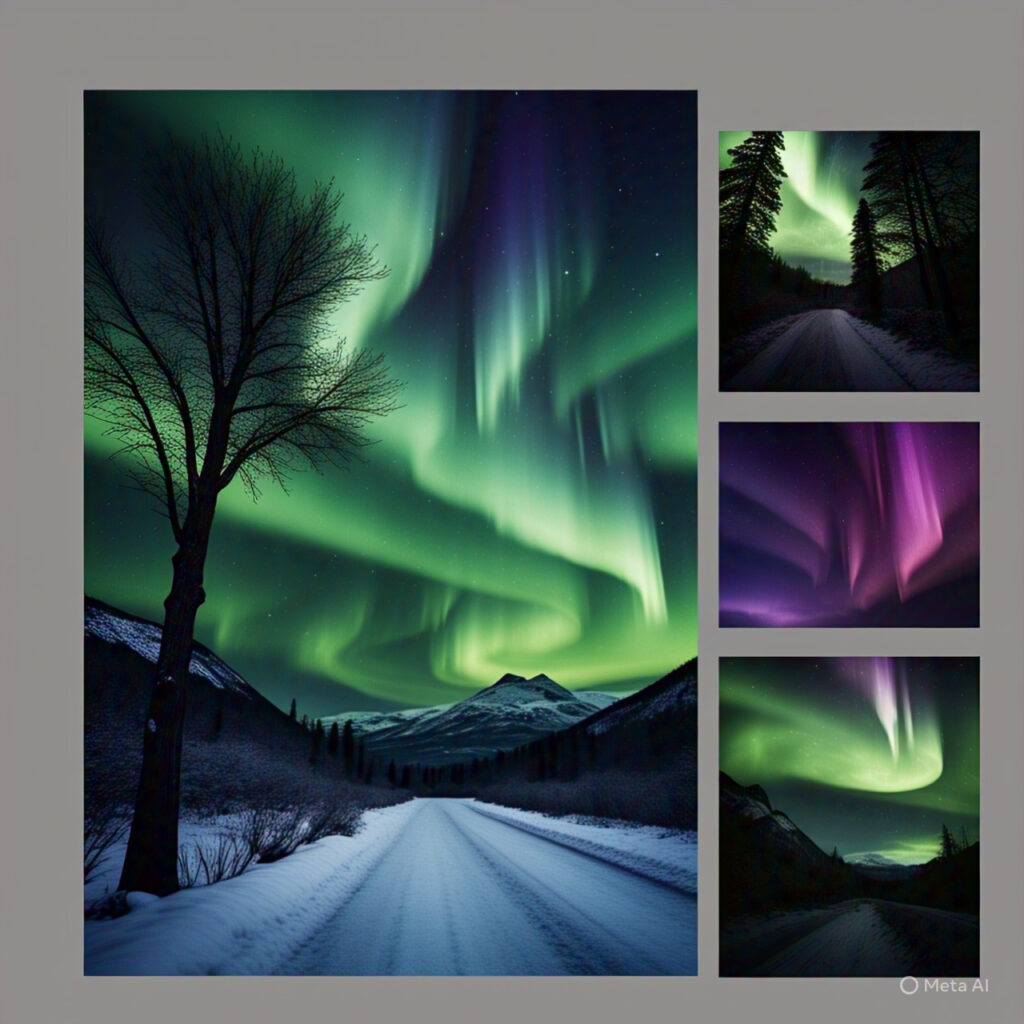
The Northern Lights, or Aurora Borealis, represent one of nature’s most magnificent displays—swirling curtains of green, purple, and red light dancing across the night sky. The Northern Lights photography experience combines technical skill, artistic vision, patience, and a touch of luck. Throughout this comprehensive guide, we’ll explore everything from camera settings to composition techniques that will help you capture this ethereal phenomenon. The Northern Lights may appear elusive, but with proper preparation and knowledge, you’ll be ready when the sky ignites with color.
Whether you’re planning a dedicated Aurora photography expedition to Iceland, Northern Scandinavia, Canada, or Alaska, this guide will prepare you to return home with breathtaking images that preserve the magic of this extraordinary natural wonder.
Understanding the Aurora for Better Photography
Before diving into photography techniques, understanding what causes the Northern Lights helps you anticipate and capture them effectively.
What Creates the Aurora: The Northern Lights begin with solar flares ejecting charged particles that travel toward Earth. When these particles collide with gases in our atmosphere, they release energy in the form of light. Different gases create different colors:
- Green (most common): Oxygen at lower altitudes (100-240 km)
- Red (rare): Oxygen at higher altitudes (above 240 km)
- Blue/Purple: Nitrogen
- Pink/Red edges: Nitrogen at lower altitudes
Aurora Patterns:
- Arcs: Steady, horizontal bands across the sky
- Bands: Twisted, elongated curtains
- Coronas: Rays that appear to converge overhead
- Rays: Vertical columns of light
- Pulsating aurora: Patches that brighten and dim repeatedly
Photography Tip: Different aurora patterns require different compositions and settings. Coronas benefit from ultra-wide lenses to capture their overhead convergence, while bands often look best as part of a wider landscape composition.
Essential Camera Equipment for Aurora Photography
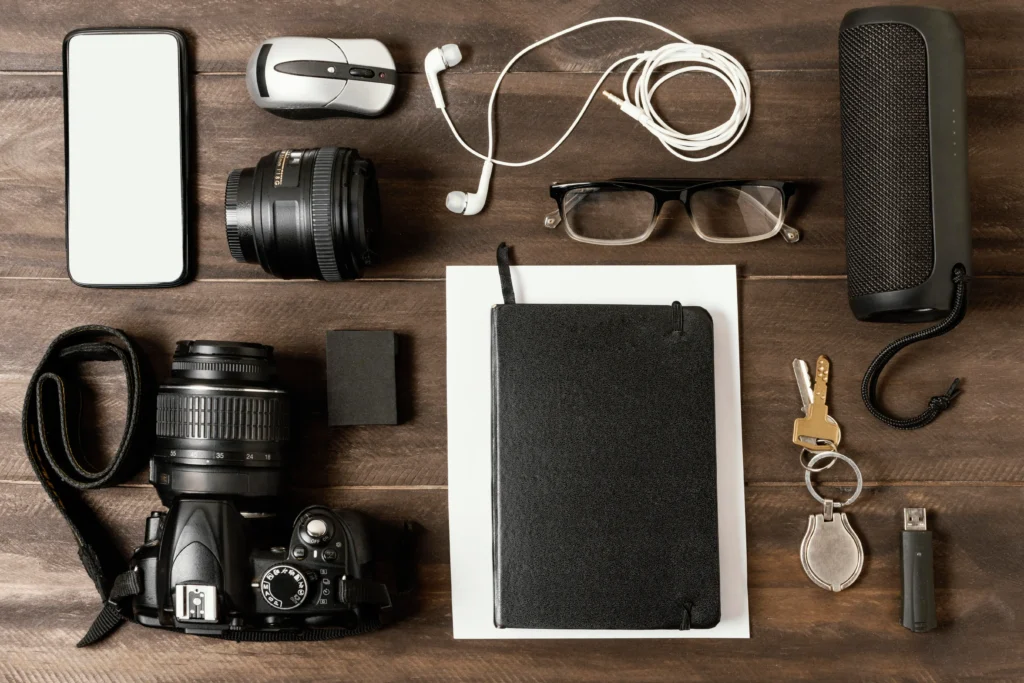
Successful Aurora photography requires specialized equipment to handle challenging low-light conditions:
Camera Body Requirements
Ideally, your camera should have:
- Full manual mode controls
- Good high-ISO performance (full-frame sensors generally perform better)
- Electronic viewfinder or live view for night focusing
- Weather sealing for cold conditions
- Interval timer for time-lapse capability
Recommended Entry-Level Options:
Professional Options:
Lenses: Going Wide and Fast
The ideal Aurora photography lens has two key characteristics:
- Wide angle (to capture more sky)
- Large maximum aperture (to gather more light)
Recommended Lenses:
- Budget option: BENFEI 4K DisplayPort to HDMI Cable
- Mid-range: Tamron 17-28mm f/2.8
- Premium: Sony FE 35mm F1.4 GM
Essential Accessories
These items are non-negotiable for Aurora photography:
Sturdy Tripod: Your tripod needs to be stable even in wind and on uneven terrain. Carbon fibre models offer the best balance of stability and weight.
Recommended: Benro TMA27A Mach3 Advanced Aluminum Tripod
Remote Shutter Release: Eliminates vibration from pressing the shutter button.
- Basic option: Wireless Remote Control
- Advanced: Intervalometer Remote Timer
Extra Batteries: Cold temperatures significantly reduce battery life. Keep 3-4 batteries in rotation.
- Tip: Store spare batteries in an inside pocket close to your body heat.
Headlamp with Red Light Mode:
Preserves your night vision while allowing you to adjust camera settings.
- Recommended: Black Diamond Spot 350 Headlamp
Camera Settings for Northern Lights Photography

Northern Lights photography requires careful balance between capturing enough light and avoiding star trails. Here’s your starting point:
Understanding the 500 Rule
To avoid star trails in your Aurora photos, use the 500 Rule to calculate maximum shutter speed:
- Formula: 500 ÷ (Crop Factor × Focal Length) = Maximum Exposure in Seconds
Examples:
- 14mm lens on full-frame camera: 500 ÷ (1 × 14) = 35.7 seconds
- 14mm lens on APS-C camera: 500 ÷ (1.5 × 14) = 23.8 seconds
Pro Tip: The 500 Rule is conservative. For super sharp stars, try the stricter 300 Rule instead.
Adjusting for Aurora Brightness
Aurora displays vary dramatically in brightness. Adjust your settings accordingly:
Faint Aurora:
- Increase ISO to 3200-6400
- Extend shutter speed toward your maximum (based on the 500 Rule)
- Open aperture to its maximum
Bright, Active Aurora:
- Reduce shutter speed to 1-5 seconds to freeze movement
- Lower ISO to 800-1600 for cleaner images
- Maintain wide aperture
Remember: First priority is always getting a properly exposed image. A slightly noisy image is better than no image at all.
Composition Techniques for Stunning Aurora Photos
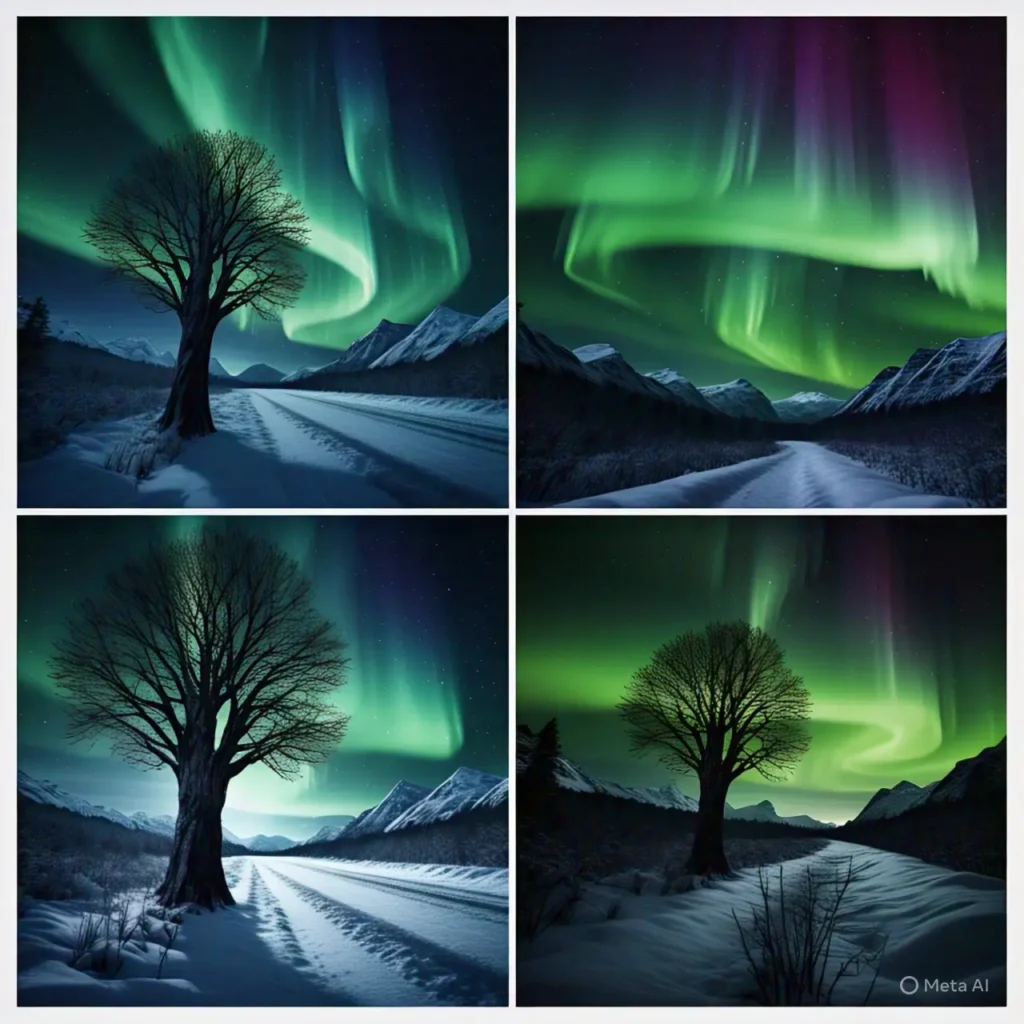
While capturing any Northern Lights image is thrilling, thoughtful composition elevates your photos from simple documentation to artistic expression.
Finding Compelling Foregrounds
Standalone aurora shots can become repetitive. Incorporate these elements to create depth and interest:
Natural Elements:
- Mountains or hills creating distinctive silhouettes
- Reflective water surfaces doubling the aurora’s presence
- Individual trees or forests as framing elements
- Snow-covered landscapes providing texture
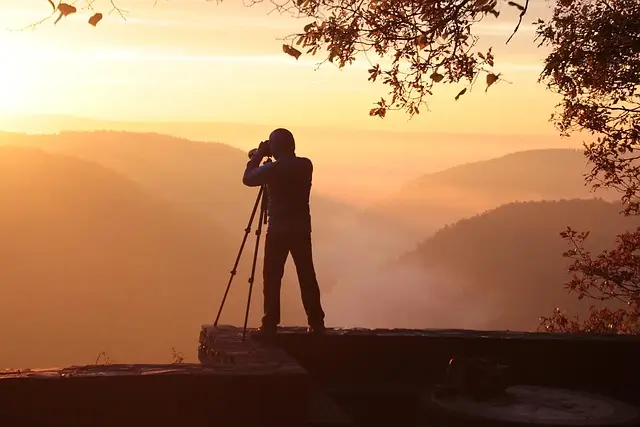
Human Elements:
- Cabins with warm window light
- Person with headlamp gazing at the aurora (scale element)
- Tents illuminated from within
- Historic structures or monuments
Pro Tip: Scout your location during daylight to identify composition elements and potential hazards. Mark interesting spots on your phone’s GPS.
Composition Rules for Aurora Photography
Classic composition principles apply to Northern Lights photography:
Rule of Thirds: Place the horizon on the bottom third if the aurora is spectacular or on the top third if the foreground is compelling.
Leading Lines: Use roads, shorelines, or mountain ridges to draw the viewer’s eye into the frame and up to the aurora.
Framing: Position the aurora between natural elements like mountains or trees to create a visual window.
Scale: Include human figures or recognizable objects to demonstrate the immensity of the aurora display.
Remember: These are guidelines, not rigid rules. The most important factor is capturing the emotional impact of witnessing the aurora.
Advanced Techniques for Aurora Photography
Once you’ve mastered basic Aurora photography, these advanced techniques will expand your creative possibilities.
Creating Aurora Time-lapse Sequences
Time-lapse photography reveals the dynamic movement of the Northern Lights in a way still images cannot capture.
Basic Setup:
- Mount camera on tripod and compose shot
- Use interval timer or remote with intervalometer
- Set interval to 2-5 seconds between shots
- Capture 300+ images (more is better)
- Process in software like LRTimelapse o
Aurora Panoramas
For epic, wide-field aurora displays that exceed even ultra-wide lens coverage:
Capture Process:
- Mount camera in vertical orientation
- Overlap each frame by ~30%
- Maintain consistent exposure settings
- Work quickly to minimize aurora movement between frames
- Stitch in Lightroom, Photoshop, or PTGui
Pro Tip: For highest quality, use a dedicated nodal slide to rotate around the lens’s nodal point, minimizing parallax.
Focus Stacking for Tack-Sharp Results
Combine perfect foreground focus with infinite stellar focus:
- First exposure: Focus on foreground with longer exposure
- Second exposure: Focus at infinity for sky and aurora
- Blend in Photoshop using layer masks
This technique works best for relatively static aurora displays.
Post-Processing Northern Lights Photos
Post-processing brings out the full potential of your Aurora images, revealing colors and details that may be subtle in the original file.
Essential RAW Adjustments
These basic adjustments form the foundation of Aurora processing:
White Balance:
- Start with 3500-4000K and adjust to taste
- Too warm (yellow) diminishes green aurora colors
- Too cool (blue) can make the image feel artificially cold
Exposure and Contrast:
- Recover shadow details without revealing excessive noise
- Add contrast to make aurora pop against dark sky
- Use Clarity/Texture sliders moderately to enhance aurora structure
Color Adjustments:
- Increase vibrance to enhance aurora colors
- Use HSL panel to selectively boost green and magenta channels
- Reduce yellow saturation if sky appears unnaturally
Noise Reduction:
- Apply luminance noise reduction carefully (25-40 range)
- Use masking to apply stronger noise reduction to sky areas
- Consider specialized software like DxO PureRAW for extreme cases
Common Processing Mistakes to Avoid
Oversaturation: Aurora photos often suffer from excessive color enhancement. The Northern Lights are magical but subtle—preserve their ethereal quality rather than creating an unrealistic neon effect.
Heavy Noise Reduction: Excessive noise reduction destroys fine aurora details. Accept some grain as part of the night photography experience.
Unrealistic HDR: While exposure blending has its place, overly processed HDR creates an artificial look that detracts from the natural wonder of the aurora.
Remember: good processing should be invisible, enhancing what’s already there without calling attention to itself.
Practical Aurora Photography Challenges and Solutions
Beyond the technical aspects, Aurora photography presents unique practical challenges. Here’s how to overcome them:
Cold Weather Operation
Extreme cold affects both you and your equipment:
For Your Gear:
- Remove batteries from camera when not shooting
- Allow gear to acclimate gradually when returning indoors to prevent condensation
- Use silica gel packets in your camera bag
- Cover unused ports with tape to prevent moisture ingress
For Yourself:
- Hand/Foot Warmers in gloves and boots.
- Touchscreen-compatible liner gloves for operating camera
- Insulated water bottle to stay hydrated (Amazon affiliate link)
- Chemical heat packs for emergency warmth
Focusing in Complete Darkness
Achieving sharp focus is one of the biggest challenges in aurora photography.
Method 1: Prefocus During Twilight
- Arrive before complete darkness
- Focus on distant object (ideally mountains or horizon)
- Switch to manual focus and tape focus ring
Method 2: Use Live View Magnification
- Find brightest star in sky
- Use live view with maximum magnification (10x)
- Manually focus until star appears as small as possible
Method 3: Use Focus Peaking Many mirrorless cameras offer focus peaking, which highlights in-focus areas.
Pro Tip: Once properly focused, apply a small piece of gaffer tape to the focus ring to prevent accidental movement.
Preserving Battery Life
Cold temperatures dramatically reduce battery performance.
- Keep spare batteries in pockets close to body heat
- Power camera off between shots during long waiting periods
- Consider battery grips for extended shooting
- For serious expeditions, bring portable power banks or battery generators
Planning Your Aurora Photography Expedition
Successful Aurora photography begins long before you press the shutter button. Proper planning dramatically increases your chances of success.
Choosing the Best Locations
The ideal Aurora photography location combines three elements:
- High likelihood of Aurora activity (generally 60°–75° magnetic latitude)
- Clear weather patterns
- Interesting landscape features
Using Aurora Forecast Tools
Several excellent resources help predict aurora activity:
Space Weather Prediction Center (NOAA):
- Provides 3-day aurora forecasts
- Measures Kp-index (0-9 scale of geomagnetic activity)
- Kp 3+ generally needed for visible aurora at typical northern locations
Mobile Apps:
- My Aurora Forecast
- Aurora Alerts
- Northern Light Aurora Forecast
Pro Tip: For best results, combine aurora forecasts with detailed weather forecasts. Clear skies are as important as aurora activity!
Creating a Shot List
Prepare a list of specific images you want to capture based on your location.
- Wide-field aurora over signature landscape feature
- Person silhouetted against bright aurora
- Aurora reflected in water feature (lake, ocean, etc.)
- Close-up showing aurora detail and stars
- Time-lapse sequence
Preparing this list ensures you don’t freeze up (mentally or physically!) when the lights appear.
1. Can I photograph the Northern Lights with my smartphone?
Modern smartphones with night mode capabilities (like recent iPhone Pro models, Google Pixel, and Samsung Galaxy S22/S23 series) can capture basic Aurora images when the display is very bright. For best results:
- Use a smartphone tripod
- Download a manual camera app (like ProCam or Manual)
- Set manual exposure to 10+ seconds
- Use timer or remote to avoid shake
- Edit with apps like Snapseed or Lightroom Mobile
However, for truly impressive aurora photography, a dedicated camera remains vastly superior.
2. How do I know when to press the shutter? The Aurora moves so quickly!
This common dilemma reflects the unpredictable nature of the Aurora. Some displays build slowly, while others pulse rapidly. For dynamic displays:
- Use continuous shooting mode
- Reduce exposure time to 2-4 seconds
- Accept some underexposure to freeze motion
- Alternatively, embrace the movement with longer exposures
Remember that your eyes see the aurora in real-time, while your camera accumulates light over several seconds, creating different interpretations of the same display.
3. Why do my Aurora photos show colors I couldn't see with my naked eye?
Camera sensors are more sensitive to color than human eyes, especially in low light. While you might see only grey-green aurora with your eyes, your camera often reveals vibrant greens, purples, and reds. This isn't "cheating"—the colours are really there, just beyond human perception in low-light conditions. This is particularly true at the beginning and end of aurora displays when intensity is lower.
4. How many nights should I plan for an Aurora photography trip?
Aurora visibility depends on both solar activity and clear skies. For reasonable chances:
- Minimum: 3-4 nights
- Better: 5-7 nights
- Ideal: 7-10 nights
The longer your stay, the better your odds. A 7-night trip during peak season (December-March) in prime locations offers roughly an 80-90% chance of seeing some Aurora activity, weather permitting.
Your Northern Lights Photography Checklist
Use this comprehensive checklist to ensure you’re fully prepared for Aurora photography:
Pre-Trip Preparation:
- Research location-specific Aurora patterns
- Install Aurora forecast apps
- Scout locations using maps and photo sharing sites
- Check moonrise/moonset times
- Purchase cold-weather gear
Essential Equipment:
- Camera with manual mode
- Wide-angle, fast lens
- Sturdy tripod
- Remote shutter release
- Extra batteries (3-4 minimum)
- Multiple memory cards
- Headlamp with red light mode Hand/foot warmers
Cold Weather Gear:
- Insulated, waterproof boots
- Multiple clothing layers
- Touchscreen liner gloves
- Heavily insulated outer mittens (remove for camera operation)
- Insulated hat covering ears
- Face protection (balaclava or neck gaiter)
- Chemical heat packs for emergencies
Ready to Capture the Dancing Skies?
Photographing the Northern Lights combines technical skill, artistic vision, careful planning, and a willingness to embrace adventure in extreme conditions. The images you create will not only preserve the memory of this extraordinary natural phenomenon but also allow you to share the experience with others who may never witness it firsthand.
Remember that even when photography conditions aren’t ideal, take time to simply observe and appreciate the aurora with your own eyes. Sometimes the most important images are those etched in memory rather than captured on sensors.
For photographers ready to embark on this magical pursuit, check out our companion article: 9-Day Northern Lights in Iceland: The Ultimate Winter Adventure for a detailed itinerary combining prime aurora viewing locations with Iceland’s breathtaking winter landscapes.

